Showing posts with label Andy Belanger. Show all posts

Friday, July 10, 2026

The Savage Sword of Conan #15 Cover Preview


Cover A: Alex Horley


When a storm whips the waves into a fury, Captain Brock worries about his prisoners' lives. His clients want him to deliver them alive. So, amid the driving rain, he orders Rodak to secure the prisoners in the hold. But when the sailor ventures below, Rodak discovers that his captives are far from helpless. Can Brock's Cimmerian captive take the ship and bring it safely into port? And will Conan's fellow captives help him, or make his life more difficult?

Here's all the info from Titan Comics:


THE SAVAGE SWORD OF CONAN #15

Writers: Jimmy Palmiotti, Amanda Conner & Tom Defalco

Artists: Andy Belanger, Ron Frenz & Pat Olliffe

Publisher: Titan Comics

Issue Length: 64 Pages, B&W

Price: $6.99

Release Date: July 15, 2026


THE SAVAGE SWORD OF CONAN returns 

with another brutal dispatch from the Hyborian Age!


Featuring a deadly tale of swapped assassination targets from writers Jimmy Palmiotti and Amanda Conner with artist Andy Belanger, the return of fan-favorite BRECKENRIDGE ELKINS from the legendary team of writer Tom DeFalco and artist Ron Frenz, striking covers from Alex Horley and Esad Ribic, plus pin-ups and more, SAVAGE SWORD OF CONAN #15 is another unmissable chapter in Conan’s savage saga!


Here are more cover options:


Cover B: Esad Ribic


Cover C: Alex Horley Foil Variant ($16.99)


Cover D: Esad Ribic Wraparound Cardstock Variant ($8.99)


Thanks to Titan Comics & Heroic Signatures for sharing this cover preview with us.


Tuesday, July 7, 2026

Blade Runner Tokyo Nexus: To Lose is to Win #3 Review


Blade Runner Tokyo Nexus: To Lose is to Win #3 Review

Writer: Nancy A Collins

Artist: Mariano Taibo

Colorist: Marco Lesko

Letterer: Andworld Design

Editor: David Leach

Cover Artists: Kit Wallis, Andy Belanger & Piotr Kowalski

Publisher: Titan Comics

Price: $4.99 US

Release Date: July 1, 2026


Mead and Stix have worked together for a long time. Yet ever since Sayo asked them to find her sister Miyuki, Mead and Stix have been moving in different directions. Now, while Madame Nomura commissions Mead to investigate her daughters' deaths, Stix protects the Cheshire scientists who killed his fellow Replicants to eliminate Tyrell's programmed lifespan.


Leaving Tokyo behind, the Blade Runner from Los Angeles searches for answers in a village protected by a modern-day Ronin. As she searches for the experimental Aurora program, Rumiko seeks to learn how Miyuki and Sayo's brother produced a Replicant assassin with a copy of Stix's consciousness. Yet no matter what they do, or where they go, Alura’s shadow covers all of them.


Can Rumiko shut down the Aurora program before more copies of Stix begin killing people? And will Mead's investigation prevent the Cheshire scientists from extending Stix's life? Let’s leap into Blade Runner Tokyo Nexus: To Lose is to Win #3 and see!


Story

After Mead and Stix left Boot Camp, they traveled to Kalanthia, where they met other participants in the Aurora program. By sharing Stix’s thoughts, Mead drew close to her Replicant partner. Some, like Munro and Nuri, went even further, filing paperwork to formalize their workplace relationship. But none of that mattered to the Tyrell Corporation. Once they demonstrated the merits of the Aurora program on Kalanthia, the company didn’t want the participants to leave the battlefield.


As Mead looks back on her past, she also pursues her investigation into Miyuki Nomura’s murder in Blade Runner Tokyo Nexus: To Lose is to Win #3. She knows how Sayo, who originally commissioned her to find Miyuki, died. But the autopsy files Madame Nomura left with her make Mead reconsider her belief that Takumi Nomura used a Replicant with Stix’s consciousness to kill his sisters.


While Mead weighs what she's learned and how it affects her and Stix's relationship with Alura, Rumiko meets with Benkei in Nancy A Collins’ story. While Yakuza families like Alura’s carve out their territories in Tokyo, Daimyos rule distant villages as modern-day feudal lords. When she meets with Benkei at the Hikawa Shinto Shrine in Omiya, the Ronin has no reason to believe that she’s not just another assassin sent by a Daimyo to take over the village. And when Benkei learns that she is a Blade Runner, Rumiko must convince him that she is on Mead and Stix's side. Only then may he help her investigate how the Cheshire scientists used a Replicant with Stix's body and memories to help Alura with a Yakuza war in Blade Runner Tokyo Nexus: To Lose is to Win #3.


Art

Torches mark a path through the snow as Rumiko trudges uphill toward a shrine. The Blade Runner's long coat contrasts with the historic armor strapped to Benkei's body. As the desk lamp illuminates the papers covering her desk, inset panels reveal Mead’s theory about Miyuki’s death. When she walks wearily toward the bedroom, Mead glances at Stix. Then, she stares at a photo on the wall.


As Mariano Taibo reveals Mead and Stix’s past, and Rumiko confronts Benkei, Marco Lesko applies a limited palette to Blade Runner Tokyo Nexus: To Lose is to Win #3. Benkei’s red armor links with his face paint, while red also tinges Mead’s musings. In her imaginings, Miyuki’s pink garment links with the blanket covering Mead’s sleeping partner. Green adorns life on Kalanthia while foliage defies the snow blanketing Omiya. Yet red flows in both the past and the present.


Jim Campbell uses colored boxes to mark locations, reveal Mead and Rumiko’s thoughts, and help readers hear broadcast messages. Black uppercase dialogue in white balloons grows bold for intonation and swells for raised voices. Sound effects presage a discovery that will haunt Mead and Stix forever, while a sticker assures that Tyrell values the new life it creates. Thanks to Titan Comics for providing a review copy.


Final Thoughts

After natural disasters destroyed Japan’s infrastructure, corporations helped the country rebuild. While Tokyo enjoys the benefits, the surrounding prefectures return to their traditional ways. In theory, corporations like Tyrell, Cheshire, and Yuyona should make life easier for everyone. But while corporate executives and Yakuza leaders fight for profits, people like Mead, Stix, Rumiko, and Benkei strive for something greater in Blade Runner Tokyo Nexus: To Lose is to Win #3.


Rating 9/10


To look inside see my preview of Blade Runner Tokyo Nexus: To Lose is to Win #3


For what happened last time, see my review of Blade Runner Tokyo Nexus: To Lose is to Win #2

For what happened before that, see my review of Blade Runner Tokyo Nexus: To Lose is to Win #1.


For how this series began, see my review of Blade Runner Tokyo Nexus: Die In Peace


Friday, January 2, 2026

The Loose End Vol 1 Review


Writer: Dave Dwonch

Artist: Travis Hymel

Colorist: Geraldo Filho

Letterer: Dave Dwonch

Cover Artist: Andy Belanger

Publisher: Titan Comics

Price: $17.99

Release Date: October 7, 2025


Steven's world has gone to hell. Or at least, to Mexico. He didn't want to come here, but his friend Diedrich talked him into it. And unlike Diedrich, who is living the high life as an actor, Steven is still looking for a way into the studio system.


Producer Benny Blevins could give Steven a chance to make it in Hollywood as a scriptwriter. But first, Steven will have to live and not die in Mexico. Can Steven help Diedrich, Benny, and the Hollywood elite flee a shooting and return to the United States? And will their adventures make for a great story? Let’s lay our cards on the table, leap into The Loose End Vol 1, and find out!


Story

Steven encouraged his friend to pursue his dreams. When Diedrich graduated from Juilliard and began starring in movies, Steven left Utah to join him in Hollywood. But instead of selling scripts and making a name for himself, Steven started drinking and gambling.


When Benny Blevins decides to get married, he invites his inner circle to a bachelor party in Mexico. Casino owner Lucca Burlusconi learns that Diedrich invited Steven along in The Loose End Vol 1. After kidnapping the aspiring screenwriter, Lucca says, “Let’s make a deal.” Benny will likely be drinking and taking drugs over the weekend. All Steven must do is slip one little pill into one of Benny's drinks. Benny dies, and no one connects the death with Lucca. In return, Lucca will wipe out Steven’s debt and give him a little extra. But if Benny doesn’t die, Lucca’s goons will pay Steven another visit.


Dave Dwonch utilizes Quentin Tarantino's signature out-of-sequence storytelling. Steven's fellow guests on Benny's bachelor bacchanal enjoy alcohol and illegal drugs. While everyone wants to have fun, Johnny Tarantula tries to outcool everyone else. Steven may be on the outside. Still, he sees how they care about each other. Dickie stands up for Johnny. Diedrich ribs Tim when his friend worries about his marital problems. Benny thinks that no woman, including Lucca's daughter, is off-limits. Still, he looks out for his "boys." That includes people like Marcus Perkins, a former actor, whom Benny gave a second career.


As in a Quentin Tarantino film, bullets and profanity fly when things go wrong in The Loose End Vol 1. But this is a story about boys who never grow up, and struggle to comprehend how their actions may harm others. It's a comment on how money and fame propel people into a fantasy world where they believe they can have whatever they want, and nothing else matters.


Art

Travis Hymel's retro art lends B-movie appeal to this story about stardom and the parties that grease Hollywood's wheels. Diedrich's car slices through traffic on the freeway, while Steven barges a minivan through crowded Mexican streets. Lucca Berlusconi and his goons smile when Steven, tied to his chair, stares up at them with pleading eyes. Yet Benny Blevins smiles and embraces Steven to ease his nervousness. As The Loose End Vol 1 pays homage to classic movies and music videos, a self-aggrandizing flyer garners more attention than its maker desires.


Geraldo Filho brightens the fun, breezy art with a limited color palette. Page borders often sync with dominant colors in the panels. Pastels soften the heavy themes of torture, rape, and addiction. As he races to the airport, Steven’s pink shirt links him with memories of Lucca’s torture. The suits Benny and the “boys” wear link him with a man who can give them “the full Mexican experience.” While Steven’s bloody fingers initially loom large, they pale in importance when crimson splatters the pages.


Uppercase letters fill white balloons and colored narrative boxes. The words grow bold, italicize for intonation, and rarely shrink. Block letters evoke screenplay descriptions while situating us in time and space. Vibrant sound effects help us hear phone calls, honking vehicles, hand-to-hand combat, gunfire, and explosions, as the rulers of two realms plot to take down a third. Thanks to Titan Comics for providing a review copy.


Final Thoughts

Steven will do anything to make his dream come true. But first, he must kill the goose that could lay his golden egg. The Loose End Vol 1 is a vivid reminder that we all need benefactors, and that the opportunity to prove ourselves may arrive in ways we never imagined.


Rating 9/10


To look inside see my preview of The Loose End Vol 1.


Wednesday, February 19, 2025

The Loose End #1 Review


Writer: Dave Dwonch

Artist: Travis Hymel

Cover Artists: Andy Belanger, Robert Hack, Travis Hymel & Kit Wallis

Publisher: Titan Comics

Price: $3.99

Release Date: February 19, 2025


Fleeing a murder scene, Steve races around Mexico City in a minivan while someone he dislikes bleeds out in the back. Despite Tim’s yelling, Steve insists he didn't land them in hot water. How did Steve get into this mess? Let's put our cards on the table, leap into The Loose End #1, and find out!


Story

Steve moved to Hollywood to pursue his dreams. Instead, he got addicted to gambling. His friend Diedrich wants to change that. But Diedrich encourages Steve's gambling.

In The Loose End #1, Steve’s world collapses because he owes everyone money. When Lucca Burlusconi learns that Diedrich got Steve an invite to Benny Blevins' bachelor party, he calls Steve's loans.


Dave Dwonch begins his story at the end, then slowly reels the projector back to show how Steve got into this dilemma. Steve encouraged his friend Diedrich to pursue his acting career. Diedrich's success in Hollywood inspired Steve to leave home and try his hand at screenwriting. But no one in the studios will take a chance on someone without writing credits. So Diedrich suggests Steve accompany him to Benny Blevin’s party. Perhaps Steve can impress Benny and get the producer to take a chance on him.


Steve's debt puts him under other people's power. Lucca Burlusconi owns the debt, which means he owns Steve. The gangster has a beef with Benny, and he’s in the mood for payback. Like Diedrich, his plan could benefit Steve. But first, Steve must murder Benny Blevins in The Loose End #1.


Art

Travis Hymel’s retro art lends B Movie appeal to this story about mob involvement in Hollywood. Diedrich's sportscar blurs as it winds through traffic on the freeway. As Diedrich tosses his keys to the valet, poses for selfies with fans, and appears multiple times in the same panel, you feel his exultation in achieving the pinnacle of success. A cloud of smoke rises from Steve's scooter as he arrives at the casino. He frowns at Steve's glowing face and hunches as he walks with his hands in his pockets.


Red and black ground the yellow, green, pink, and purple pastels. The limited palette and set pieces lend The Loose End #1 a timeworn quality. Two nine-panel pages show how Steve allows the casino to play him. After riding home beneath purple skies, Steve lies on his bed beside a clock with red LED numbers. Behind him, blue lines and dots on the black wall suggest stars and constellations.


Uppercase letters fill white balloons and colored narrative boxes in The Loose End #1. The words grow bold and italicized for intonation and rarely shrink. Vibrant sound effects help us hear phone calls, honking vehicles, punching, and banging on Steve's door. Trigger warnings include gambling, drinking alcohol, and a brief torture scene, while a handwritten note on a green corkboard encourages Steve to be better. Thanks to Titan Comics for providing a copy for review.


Final Thoughts

Steve is a good guy, but his poor choices could kill him. The Loose End #1 shows how Steve got in this mess, then skips over the bachelor party that sends him fleeing a bloodbath with Diedrich's costar and a bleeding man. It's a cautionary tale about how poor choices can become habits and how easy it is to run afoul of the fickle entertainment industry.


Rating 8.8/10


To look inside see my extended preview of The Loose End #1.

Thursday, September 19, 2024

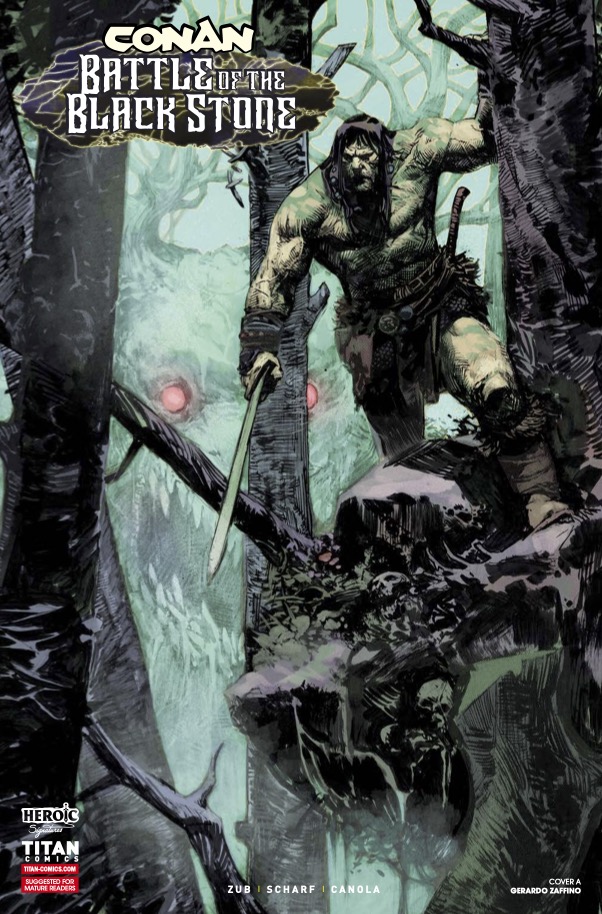
Conan The Barbarian: Battle of the Black Stone #4 Covers

COVER A: THOMAS NACHLIK


CONAN THE BARBARIAN: BATTLE OF THE BLACK STONE #4 (OF 4)

(W) Jim Zub

(A) Jonas Scharf

Publisher: Heroic Signatures & Titan Comics

FC, 32pp, $3.99, On Sale December 4, 2024


CONAN OF CIMMERIA IS HAUNTED BY SHADOWS, LIVING NIGHTMARES CONNECTED TO A MYSTERIOUS EYE SYMBOL ETCHED IN BLACK STONE.


An unspeakable evil looms over the Hyborian Age and every age connected to it... and it will take more than a lone barbarian to stop its relentless march upon time, space, and sanity.


Here are two more cover options.


COVER B: ANDY BELANGER


COVER C: MIKE DEODATO


You can also order a special 4-pack. It comes with a bonus cover!


CONAN THE BARBARIAN: BATTLE OF THE BLACK STONE #1-4 PACK

(W) Jim Zub

(A) Jonas Scharf

Publisher: Heroic Signatures & Titan Comics

FC, 5*32pp, $19.99, On Sale January 29, 2025


COLLECTS #1-4 OF CONAN THE BARBARIAN: BATTLE OF THE BLACK STONE – THE EPIC NEW CONAN EVENT FROM HEROIC SIGNATURES AND TITAN COMICS. FEATURES A BONUS #1 GERARDO ZAFFINO COPIC VARIANT - EXCLUSIVE TO THIS PACK! LIMITED TO 750 COPIES!


ISSUE #1 COVER: GERARDO ZAFFINO


ISSUE #2 COVER: ROBERTO DE LA TORRE


ISSUE #3 COVER: LIAM SHARP


ISSUE #4 COVER: THOMAS NACHLIK


BONUS ISSUE #1 COPIC VARIANT BY GERARDO ZAFFINO


Thanks to Titan Comics for sharing these cover options with us!


Friday, September 6, 2024

The Savage Sword Of Conan #4 Review Part 2


Writers: Jim Zub, Patch Zircher, Jeffrey Shanks, Fred Kennedy & Ron Marz

Artists: Fernando Dagnino, Patch Zircher, Dean Kotz, Eryk Donovan, Andy Belanger & Mike Perkins

Pin-Ups: Nick Marinkovich, Fernando Dagnino, Patch Zircher, Dean Kotz, Eryk Donovan, Andy Belanger, Mike Perkins & Roberto De La Torre

Letterers: Richard Starkings, Tyler Smith & Jimmy Betancourt

Cover Artists: Alex Horley & Cary Nord

Publisher: Titan

Price: $6.99

Release Date: August 28, 2024


The symbol inscribed on a black stone permeates time and space. It haunts the rich and poor alike, tempts people in remote villages and bustling towns, and calls heroes to battle. How might its power challenge Conan, Soloman Kane, and the Pict scout Brissa? And how might it affect lesser-known Robert E Howard characters like Conrad, Kirowan, Dark Agnes, and El Borak? Let’s grab our battle axes, leap into Savage Sword Of Conan #4, and find out! 


Horror From The Tomb: Story

In Jeffrey Shanks’ story, Steve O’Donnell sent John Conrad and John Kirowan an urgent summons. John Kirowan loaned him a dark book about Earth's prehistory, and O'Donnell believed he had discovered a Stygian city. John Conrad doubts O'Donnell's judgment. Conrad’s doubts appear warranted when he spies a box of dynamite in O'Donnell's tent. But the tent and excavations are devoid of people. When Mahmoud left to escort O’Donnell’s friends from Cairo Airport, the dig site was a hive of activity.


Jeffrey Shanks’ tale in The Savage Sword Of Conan #4 is a fraught supernatural mystery. Danger forces one partner to reverse his position at the risk of becoming a hypocrite. Their discovery threatens their friendship and raises the ire of the local authorities.


Horror From The Tomb: Art

The three men cross the dunes on camels. Kirowan, Conrad, and Mahoud appear tiny as they descend ladders into the multilevel excavations. Conrad holds a lamp aloft while Kirowan traces imagery on a stone wall. An overhead camera angle shows the men discover a coffin with a familiar symbol inscribed on the top. Eryk Donovan's art evokes the otherworldly history Rick, Evelyn, and Jonathan discover when they ignore Ardeth Bay’s warnings and unearth Imhotep in Stephen Sommers’ movie The Mummy.


Matrimony: Story

Dark Agnes battles pirates aboard a ship on a storm-tossed sea. Then she climbs a rocky hill toward a manor house surrounded by barren trees. She climbs through a window and enters Duke Ilya Kursonovich's home. Dark Agnes explores an armory. She spies a symbol inscribed on a wooden panel instead of a black stone and bursts into the adjacent room. There, a dark priest captures her in his spell and sends her to a land of dreams where the symbol invades her memories.  


In Fred Kennedy’s tale in The Savage Sword Of Conan #4, Dark Agnes and Etienne Villiers travel east to work as mercenaries. Their plans changed when they reached Chartres. Black magic summoned the dead from their graves. Townspeople lived in fear of human sacrifices and unholy rights. Dark Agnes and her friend decided to investigate the Duke’s home. But Etienne never showed, so Agnes investigated alone. 


Matrimony: Art

Andy Belanger's haunting and lifelike imagery makes this tale mesmerizing. Belanger uses a variety of highly detailed art styles. Manga mixes with classic children's book illustrations and Prince Valiant. Shading and ink washes are highly refined. You never quite know where you are with each stroke of Belanger's pen or brush, but you know you’ll enjoy the ride.


Black Oasis: Story

In Ron Marz's tale, a man recounts his childhood adventure with Francis Xavier Gordon. He was the son of a tribal chief. When he was young, another chieftain abducted him. His father, not wanting to cede money or lands to his rival, hired Gordon to rescue him. Gordon spirits the boy from his imprisonment at night, then transports him across the desert on a camel.


Although Gordon hails from Texas, the locals call him El Borak, which means swift in their tongue. Gordon reads the desert landscape like a native. Although six men pursue them, Gordon knows the sun will make the day unbearably hot. Ignoring the boy's protests about dark magic, Gordon brings him to an abandoned temple.


Black Oasis: Art

Mike Perkins portrays figures clad in Arab robes riding camels across bleak deserts. El Borak and his charge arrive at a temple carved into a sandstone cliff. Unlike Indiana Jones, no Nazis await the Texan inside the labyrinth. But among the pictographs and symbols etched into the stone walls, Gordon spies the sigil of the Black Stone between spiral columns. Robert E Howard’s El Borak stories are more adventure fiction than sword and sorcery, and that’s true with this final story in The Savage Sword Of Conan #4. But it’s a rip-roaring reminder of the frantic fighting that made Marvel’s original series so much fun.


Lettering

Richard Starkings, Jimmy Betancourt, and Tyler Smith fill dialogue balloons and narrative boxes with uppercase and lowercase words. The Gawr speaks giant white words in black balloons. Sound effects help us hear werewolves howl, a flintlock discharge, Kirowan losing his revolver, Dark Agnes accepting a man's hand, and El Borak bringing a sword to a gunfight. Thanks to Titan Comics for providing a copy for review.


Final Thoughts

When the Black Stone assaults Conan’s sanity, other heroes rise against this black magic that ripples through space and time. Soloman Kane, Brissa the Pict, Conrad and Kirowan, Dark Agnes, and El Borak join our barbarian hero in battling the symbol that drives people to evil and raises the dead in The Savage Sword Of Conan #4.


Rating 9.6/10