Cookie Warning

Warning: This blog may contain cookies. Just as cookies fresh out of the oven may burn your mouth, electronic cookies can harm your computer. Visit all kitchens and blogs (yes, including this one) with care.

Wednesday, June 26, 2024

Amazing Spider-Man: Blood Hunt #2 Review


Writer: Justina Ireland

Pencilers: Marcelo Ferreira & Chris Campana

Inkers: Roberto Poggi, Sean Parsons & Craig Yeung

Colorist: Rachelle Rosenberg

Letterer: Cory Petit

Cover Artists: Marcelo Ferreira, Roberto Poggi & Rachelle Rosenberg

Publisher: Marvel

Price: $3.99

Release Date: June 12, 2024


Peter Parker teamed with the Lizard and Misty Knight to rescue her partner Colleen Wing and Dr. Michael Morbius. The Lizard led Spider-Man and Misty to an abandoned church with an underground lair. But when vampires swarmed the fake church, the terrific trio sought refuge at a church guarded by troops armed with holy water weaponry. Can Spider-Man, Misty, and Lizard rescue Colleen and Dr Mike? Does Dr Mike have a cure for vampirism? And why do vampires seem drawn to the Lizard? Let’s grab some garlic, thwip into Amazing Spider-Man: Blood Hunt #2, and find out!


Story

TJ once worked for the Beyond Corporation. Now, he is Theocritis, the vampire CEO of Hemoglobin Inc. Theocritis is developing three vampire-related products for the market. One of them is Cure, which curbs a vampire’s bloodlust. Theocritis used Dr Morbius' blood to engineer Cure. Dr Morbius has spent years seeking a way to go from Living Vampire to Human. Hemoglobin Inc. hasn't found the solution, but they've achieved promising results. Dr Morbius agrees to peruse their research and see if he can help Theocritis. Although he plays it cool, Dr Morbius has a good reason to help out Theocritis in Amazing Spider-Man: Blood Hunt #2. The vampire CEO imprisoned Dr Morbius’ friend, Colleen Wing. The private eye can shrug off a pair of handcuffs, but Colleen will need more than a hairpin to escape the vampire compound.


While others largely yanked Peter’s strands until now, he plays detective as effectively as Colleen or her partner Misty in Amazing Spider-Man: Blood Hunt #2. He doesn’t benefit from Theocritis’ briefing, but Spider-Man intuits the Lizard's vampiric appeal. That victory comes with a cost. Still, it enhances Spider-Man's understanding of the web in which Misty and the Lizard ensnared him. Theocritis founded his company on Beyond Corporation’s proprietary technology. Maxine Danger insists that anything Theocritis develops belongs to her. Spider-Man plays it cool and doesn’t give away that he discovered Misty and Colleen were working with Maxine Danger.


Justina Ireland doesn’t clarify Theocritis’ connection with Blade and The Structure. Still, a vampire invasion provides the perfect cover for Theocritis to ramp up his vampiric business operations. Theocritis is on a rapid journey from office flunky to CEO, but he's still a fanboy. The way he manipulates an employee suggests his goals are less than noble. Still, at least Theocritis' efforts address a social ill that most elected officials would rather ignore than tackle.


Art

Justina Ireland’s story is so spectacular that it takes an army of artists to bring it to life in Amazing Spider-Man: Blood Hunt #2. Marcelo Ferreira, Chris Campana, Roberto Poggi, Sean Parsons & Craig Yeung convey the impressive laboratory of Hemoglobin Inc. Colleen peers out through the glass panel of her sanitized pen. Her expression and the bite marks on her neck suggest she's no longer in a hitting-and-quipping mood. High-speed camera shots reveal Spider-Man's acrobatics in the park, but the Lizard's ground-shaking landing disperses the undead. Maxine Danger may have escaped jail, but the prim and stylish CEO opts for attire and a new corporate vehicle taken from Wez’s gang in The Road Warrior.


Rachelle Rosenberg conveys the cleanroom environment of Theocritis' biotech startup. He may wear a suit, but his all-red ensemble suggests his likely future residence, provided Maxine doesn't get to him first. The skies of New York take on attractive pinks, purples, and oranges. The lamp posts and the glowing headlights of Misty’s motorcycle illuminate the yellow-green ground fog that hovers over the park. Rosenberg also enlivens silhouettes with purple highlights, completing the eerie atmosphere in Amazing Spider-Man: Blood Hunt #2. Amid all the gray, bloodless vampires, Misty Knight's red outfit, enlivened with reflective black leather and her golden arm, seems the perfect foil for pink-haired Maxine's Punk sensibilities.


Cory Petit thwips large black uppercase lettering into white dialogue balloons and white narrative boxes with red borders. Spider-Man’s thwips and the Lizard's roaring complete this story of corporate warfare and the toll it takes on everyone when CEOs value profits over people. Thanks to Marvel for providing a copy for review.


Final Thoughts

After his recent battles with Ben Reilly, Peter Parker finally meets the woman who stole his clone’s memories. While Miles Morales’ mentor agrees to meet Peter halfway, her partner is in danger of joining the undead in Amazing Spider-Man: Blood Hunt #2. But is a manufactured vampire the equal of a natural-born bloodsucker?


Rating 9.4/10


To preview interior art see my review at Comic Book Dispatch.

Tuesday, June 25, 2024

Deadpool #3 Review


Writer: Cody Ziglar

Artist: Rogê Antônio

Colorist: Guru-eFX

Letterer: Joe Sabino

Cover Artists: Taurin Clarke; Greg & Tim Hildebrandt; Rob Liefeld; Matthew Waite

Publisher: Marvel

Price: $3.99

Release Date: June 12, 2024


The Touch is a mystic cult of Kung Fu psychos obsessed with death. Their leader, Death Grip, gets a high from killing. So he sets his sights on a seemingly impossible target, the ever-lovin-and-regenerating Deadpool. How does Death Grip plan to kill the Merc With A Mouth? Let's leap into Deadpool #3 and find out!


Story

Deadpool thought he had scored an easy gig. He would hang out at Streaming Con, guard his client Derek, and sell a few signed headshots to help pay Taskmaster’s field tax. Instead, Crossbones blasts into the meeting hall, and unlike Deadpool, he’s shooting off more than his mouth. Crossbones gets Deadpool dead to rights, but no one counts on Ellie crashing the party.


Deadpool thought he’d stashed his daughter safely away in Arizona. But Ellie is determined to be his Pain In The Ass daughter. She spliced her foster mother’s SHIELD LMD hand with the cellphone Deadpool gave her and built a teleporter. His daughter distracts Crossbones, but Taskmaster, Princess, and Deadpool must now act to protect Ellie from Death Grip’s agent.


In Deadpool #3, Death Grip’s rival has something he wants. When Solem learns Death Grip's target, he gives the Muramasa Blade away with his blessing. Muramasa was a master swordsmith of feudal Japan who imbued his swords with magic. Death Grip won’t be bothered if Crossbones fails. Killing Deadpool would be the ultimate rush!


Despite Ellie's desire to learn what makes her dad tick, she presents Deadpool with a dilemma. She knows he is a mercenary, but he doesn't want her to watch him kill people. But sending Ellie back to Terry and Emily's home would accomplish nothing. Ellie would watch more New Toobe videos and find another way to return. Whether Deadpool likes it or not, he’s stuck with his daughter.


In Deadpool #3, the mirthful Merc realizes he must look over both of his daughters, even if they have a healing factor. Reeling from losing Valentine, Deadpool realizes he can't bury his longings in work. While Cody Ziglar packs his story with action, mysticism, and laughs, it’s all about family, friendship, and acceptance of others, regardless of their appearance or what they can do for you. 


Art

Rogê Antônio conveys the heat of battle as The Touch storm Solem’s palace. Bullets fly, feet kick, and a blast from Death Grip's hands reduces an opponent to a smoking skeleton. Death Grip covers his face with cloth and symbols and conjures a blue blast with his wrapped hands. The way the mask hangs over Death Grip’s nose and mouth evokes Davy Jones playing his organ aboard the Flying Dutchman. Crossbones’ assault on Streaming Con is equally explosive. Crossbones wields weapons with Arnold Schwarzenegger’s muscles, including a rifle evoking Jesse Ventura’s in Predator. Deadpool reacts to Crossbones’ intrusion on his firm’s first assignment with a half-page of stabby panels. Crossbones and Deadpool hurtle toward the ceiling in a vertical half-page. But Ellie's appearance stipples Crossbones with white and bathes him in blue and purple energy.


Guru-eFX lavishes a loaded palette of appealing colors on Rogê Antônio's art in Deadpool #3. Taskmaster's blue-and-gold shield looks good beside Princess' red fur and Derek's purple jacket, while Crossbones' explosives fill the meeting hall with glowing yellow smoke. Blue and purple rule The Touch's compound, while the gleaming red Muramasa Blade fills Death Grip's eyes with white light. All the trash and stains in Deadpool's gray and green corporate headquarters suggest where he should spend Derek's check. But the streak of light blue that crosses the rubble-filled storage closet shows what Deadpool values most.


Joe Sabino skewers dialogue balloons with black uppercase lettering in Deadpool #3. The Merc With A Mouth always speaks in yellow fields, while his canine daughter speaks white words into red balloons. The font size makes for easy reading, while the sound effects enliven battles, help us hear Death Grip's power, and remind us that even a child can wield surprise as an effective weapon. Thanks to Marvel for providing a copy for review.


Final Thoughts

While Taskmaster adds expenses to his invoice, he protects Ellie, finds a connection between the girl and himself, and agrees to avenge Deadpool if The Touch silences the Merc With A Mouth. What strange magic does Deadpool's Human daughter wield in Deadpool #3?


Rating 9.8/10


To preview interior art see my review at Comic Book Dispatch


Monday, June 24, 2024

Deadpool & Wolverine WWIII #2 Review


Writer: Joe Kelly

Artist: Adam Kubert

Colorist: Frank Martin

Letterer: Joe Sabino

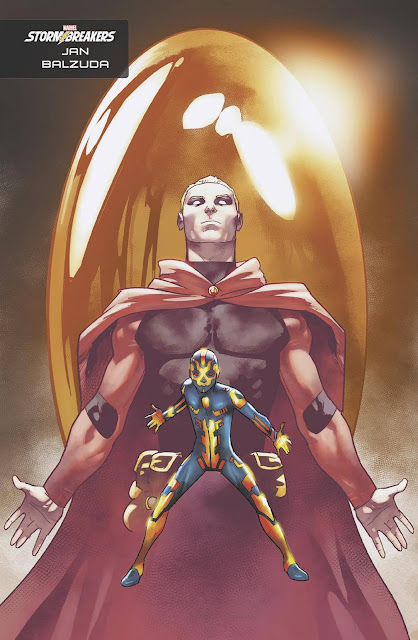
Cover Artists: Adam Kubert & Frank Martin; Jan Bazaldua & Edgar Delgado; Salvador Larroca & GURU-eFX

Publisher: Marvel

Price: $4.99

Release Date: June 12, 2024


Someone monkeyed with a man and created Wither. Wolverine wants to know who gave him superpowers that propelled him on an insane murder spree. Wolverine thinks Deadpool knows. But Deadpool’s left town. Wolverine tracks his frenemy to Russia, where he discovers that Deadpool isn’t himself anymore. He’s let the monsters who created Wither experiment on him. Can Wolverine cure Deadpool of his madness? Or will Deadpool forever be known as Wade Wilson The 3rd? Let’s extend our claws, leap into Deadpool & Wolverine WWIII #2, and find out!


Story

Wade has money. His abilities and antics grant him notoriety. His body heals injuries but can’t cure his cancer-ridden appearance. His looks drive people away. The way he draws solace in diversion, ditto. A man named Delta asks, “What if I could help you achieve your potential?” Wade agrees, but he fears change. So, he left “the world’s crappiest trail of breadcrumbs” for Wolverine to follow. Wolverine’s intrusion interrupts Delta’s experiment. So Delta asks Greta to teleport Deadpool (or WWIII) and Wolverine into the wilderness and transforms a sprint into a marathon. Like Queen Victoria, Delta's investors are not amused.


In Deadpool & Wolverine WWIII #2, Deadpool wasn't happy, but neither was Wolverine. Perhaps neither man can find fulfillment, given the lives they lead. But Wolverine finds purpose as he tends to WWIII. His selfless sacrifice demonstrates the difference between the two men. Wade tried to buy a meaningful life. But some things can't be given or purchased. Joe Kelly's punishing story puts science in the crosshairs. It asks questions. Can man improve on nature? Are we happiest when we work at our maximum potential? Or are we happiest when we can sit quietly and be one with nature and those around us? It's a divide as wide as the gulf between the Blue Wave and MAGA, and the story tackles presumptions associated with social and economic status.


Ultimately, Deadpool & Wolverine WWIII #2 is a tragedy. Science tried to give both men a new lease on life. Yet all it did was forge effective killing machines. There's a term associated with doing the same thing again and expecting different results. And that word is not sanity. But then, Delta’s earlier experiment produced Wither.


Art

Like Deadpool, Adam Kubert seeks a change in orientation. So Kubert turns the pages sideways to force readers to adapt or die. Or he works across two pages, taking readers on wide-screen narrative journeys. Drones follow this experiment, even when the participants travel from Delta's compound to a land far, far away. Spectators watch the gladiators fight and endure the elements as silhouettes standing before a Drive-In Movie Screen, not the comparatively diminutive high-def replacements in your local multiplex viewing room. Greta stands apart from the onlookers with her punk attire, green hair, and tattooed skin. Her black lips are small and delicate, even when covered with a burst bubble of gum. But when she opens her mouth, it hinges wide like a snake’s in Deadpool & Wolverine WWIII #2.


Frank Martin demonstrates Greta’s power as disembodied pink lips that dwarf characters. Like Delta's affluent patrons, she eats people and spits them out. Pink and purple dominate pages as the colors portray the new power surging through Wade Wilson The 3rd. The colors form smoke, rays of light, or tiny rectangles that hover around regenerating limbs. But the rectangles swarming around Delta are as fascinating as his purple veins. Is Delta a construct in Deadpool & Wolverine WWIII #2? Can he even know himself if he's addicted to constantly changing circumstances?


Joe Sabino casts Weapon X-worthy lowercase black letters into white and colored balloons and boxes. Sound effects help us hear Greta’s teleportation and heighten fight scenes. Yet the red letters that accompany coughing pull on the heartstrings. Thanks to Marvel for providing a copy for review.


Final Thoughts

Delta entertains wealthy clients by experimenting on unhappy people. Like Doctor Moreau, he seeks to improve on the base model. But what will shape Wade Wilson's destiny more in Deadpool & Wolverine WWIII #2? Wolverine’s pity or the impatience of Delta’s clients?


Rating 8.6/10


To preview interior art see my review at Comic Book Dispatch.

Sunday, June 23, 2024

Teenage Mutant Ninja Turtles/Usagi Yojimbo: Saturday Morning Adventures #1 Review


Writer: Erik Burnham

Artist: Jack Lawrence

Colorist: Luis Antonio Delgado

Letterer: Ed Dukeshire

Cover Artists: Jack Lawrence & Luis Antonio Delgado; Chris “Mista Jonz” Jones; Jon Sommariva & Francisco Perez; Stan Sakai & Emi Fujii

Publisher: IDW

Price: $5.99

Release Date: June 12, 2024


Donatello brought Usagi to New York. Usagi guards an incubating dragon and helps out at Obento’s animal shelter. Michelangelo likes Usagi so much that he slapped the rabbit with a pizza. But does Usagi’s destiny lie in New York or his homeland? Let's order a thick crust pepperoni, tune into Teenage Mutant Ninja Turtles/Usagi Yojimbo: Saturday Morning Adventures #1, and find out!


Story

Like the Turtles, Usagi patrols Obento’s neighborhood. When thieves break the lock on a shopfront, he gives them a good seeing-to. Applause erupts. Usagi turns to find his Turtle friends. Aside from their visit, the Turtles have another surprise for Usagi. Donatello has found a way to send him home.


Thanks to a suggestion from Master Splinter, the Turtles step through Donatello’s dimensional with Usagi. Leonardo loves the tranquil forest, Rafael misses the hubbub of the big city, and Michelangelo can’t wait to sample the culinary delectations of Usagi’s world. As they hasten toward Usagi’s village, a creature leaps from the shadows and attacks Usagi. While the two exchange sword blows, the Turtles strain to distinguish their dark attacker amid the shadows. Donatello brightens his Turtlecom’s viewscreen. When he shines it toward Usagi, the dark assassin dissolves in a puff of smoke.


Usagi’s friend Kai informs them that dark shadows have fallen on the land in Teenage Mutant Ninja Turtles/Usagi Yojimbo: Saturday Morning Adventures #1. Vampires may not fill the skies, but Shadow Warriors have defeated the Shogun's elite warriors and captured all who opposed him. Their master, Lord Desmodus, now rules from a castle on a nearby hill. Could Usagi have prevented this tragedy? All he knows is that the holiday is over. It's time for the Turtles to return home so he can free his people.


In Teenage Mutant Ninja Turtles/Usagi Yojimbo: Saturday Morning Adventures #1, Usagi is called Usagi Yojimbo, not Miyamoto Usagi. The story doesn’t revolve around what it means to be a samurai or a ronin in Usagi’s world. Instead, Erik Burnham focuses on what the Turtles do best: helping others, supporting their friends, remaining resolutely upbeat, and defeating Bad Dudes (especially megalomaniacal alien bad guys). While all the Turtles shine, Donatello's quick thinking proves the sharpest blade. He helps them navigate the hurdles Desmodus sets in their way. Donatello also adjusts his thinking when he discovers more things in this dimension than are dreamt of in his philosophy.


Art

As green smoke rises above a city bathed in the yellow moon's light, three thieves wearing green shirts adorned with a brown shell break a gold padlock. While two wear square masks, all three wrap red bandanas with eyeholes around their heads. But Usagi isn’t fooled by the reptilian pretenders. Clad in his lavender Kimono and black Katama, Usagi punches and kicks the thieves into an early night. The Turtles clap and smile while Michelangelo lifts his arms in admiration. Leonardo and Usagi bow parallel to the ground, sharing each other's gaze. The Turtles take Usagi to Donatello's lab, where Mikey enjoys a slice of Cheesy Pepperoni. Donatello presses a control and gestures to the portal as it shows the forest near Usagi's village.


Luis Antonio Delgado lavishes a loaded palette of attractive colors on Jack Lawrence’s art in Teenage Mutant Ninja Turtles/Usagi Yojimbo: Saturday Morning Adventures #1. Delgado and Lawrence portray Usagi as he looked in the 1980s TMNT TV series. The black Shadow Warriors aren't hawks, but they have wings and will remind readers of a character from TMNT: Saturday Morning Adventures #8. Desmodus doesn’t fight crime, but he displays a familiar symbol on the chest of his purple armor. Delgado casts Kai's memory in beige, tan, and brown, reminiscent of his village's wood frame houses and thatch roofs. Blue and purple robots hover around a pulsing bright green column, reminiscent of the armor Desmodus prizes.


Ed Dukeshire's uppercase black letters in white dialogue balloons will please pizza lovers of any age. Words rarely shrink and embolden for inflection, while Desmodus’ computer utters larger machine font in rectangular boxes. Energetic and colorful sound effects help us hear swords clang, Desmodus’ jubilant laughter, and Donatello’s searing invention. Yet a gentle cough clears the air and enlightens the reader in Teenage Mutant Ninja Turtles/Usagi Yojimbo: Saturday Morning Adventures #1. Thanks to IDW for providing a copy for review.


Final Thoughts

Raphael grudgingly leaves New York City amid signs of his rising popularity. Yet Raphael endorses their mission wholeheartedly when he discovers the threat to Usagi's world. He requests poetry, admonishes Donatello for labeling people, and discovers a new favorite vehicle in Teenage Mutant Ninja Turtles/Usagi Yojimbo: Saturday Morning Adventures #1.


Rating 9.6/10


To preview interior art see my review at Comic Book Dispatch.


Saturday, June 22, 2024

Helen Of Wyndhorn #3 Review


Writer: Tom King

Artist: Bilquis Evely

Colorist: Matheus Lopes

Letterer: Clayton Cowles

Cover Artists: Bilquis Evely and Matheus Lopes; Fábio Moon

Publisher: Dark Horse

Price: $4.99

Release Date: June 19, 2024


After Thomas Rogers dies, his partner hires an auction house. The dealer admires the framed art adorning one of Christopher Krieger Cole’s books. A recent movie heightened interest in the early 20th Century author. The dealer believes the art will command a princely sum and asks for more items associated with C.K. Cole. The partner points to boxes containing Thomas’ research for his biography, Fighting Monsters: The Life And Tragic Death Of Fantasy Master C.K. Cole. Among Thomas’ notes are cassette tapes of his interview with Lilith Appleton. What more can we learn about C. K. Cole, his father Barnabas, and his daughter Helen from the girl’s governess? Let’s grab our pens and notepads, leap into Helen Of Wyndhorn #3, and see what we can learn!


Story

Barnabas promised Lilith that he and Helen would return in a few days. But a month passed before Helen burst into Lilith's bedroom one night. Helen was enthusiastic and yearned to tell her governess of her adventures. But Lilith chides Helen for her unladylike conduct. Still, Helen's story bursts out like a lock releasing water into a river. Helen explains that she and her grandfather walked for hours until they came to the boundary of the Wyndhorn estate. They entered a cabin and emerged in a desert.


Helen Of Wyndhorn #3 transports readers to fantastic locals. Helen’s adventures with her grandfather bring her father's stories to life. She realizes that C.K. Cole based his tales of Othan on Barnabas' exploits. Helen also discerns a crucial difference between herself and her father. Or perhaps it is too soon to say, as she only paid one visit to this fantasy land. But her father spent his life running away from Wyndhorn and interpersonal conflicts. He didn't want Helen to read his stories. In the end, Christopher abandoned her when alcohol could no longer distract him from the future he envisaged or the knowledge too terrible to bear.


Tom King mixes folklore and epic fantasy with Judeo-Christian beliefs in Helen Of Wyndhorn #3. Helen learns about her family and heritage as she ventures as a stranger into a strange land. Readers also learn why Thomas rejected Lilith’s Amazing Stories. Yet we are left to wonder why Thomas did nothing with them after listening to the cassette tapes again following his book signing. But then, it is one thing to celebrate fantasy and another to believe it.


Art

Helen’s journey fulfills Lilith's hopes. The young woman beams as she regales her governess with her exploits. Yet how long until that enthusiasm dims in the wood-paneled fortress, surrounded by inked walls?


The Wyndhorn Estate has never looked wilder as Helen tugs the little horned animal up a hill and through the overgrown trees and shrubs. A crone sits outside a cottage, evoking the collected tales of The Brothers Grimm. But the varied landscapes that Helen, Barnabas, and the flyune traverse owe more to Peter Jackson than Terry Gilliam. Tom King's story suggests tales by Robert E. Howard and H P Lovecraft, but Bilquis Evely’s settings and people recall fantasies by Michael Moorcock, Jack Vance, and Larry Niven.


Matheus Lopes applies limited palettes to fantasy landscapes in Helen Of Wyndhorn #3. The color sets change as the travelers brave deserts, swamps, and snow-capped mountains. Yet Lopez lavishes a loaded palette on settings such as a tavern illuminated by glowing orbs, a twisted tree beside a stream, and a woman who welcomes the flyune. This final scene proves so radiant that readers will understand why Barnabas, the mighty warrior, departs so quickly. But then, they share a history that changes Helen's understanding of herself.


Large uppercase black letters inhabit ivory dialogue balloons. Ivory letters in green balloons show the crone's utterances. White letters in black balloons reveal the radiant, godlike woman's conversation. Thomas Rogers never shared Lilith's Amazing Stories with his readers, so Clayton Cowles does the honors with cursive lowercase letters on yellowed parchment. Despite all the times crimson stains Barnabas' sword, no sound effects enhance Helen's initiation to this fantastic world. But enlarged black letters threaten to burst their balloon amid a fight to the death in Helen Of Wyndhorn #3. Thanks to Dark Horse Comics for providing a copy for review.


Final Thoughts

Lilith begged Barnabas to take an interest in his granddaughter. Barnabas may be a man of few words, but their fraught and dangerous journey banishes the distance between them and the despair that hung over Helen after her father's suicide in Helen Of Wyndhorn #3.


Rating 9.4/10


To preview interior art see my review at Comic Book Dispatch.

Friday, June 21, 2024

Usagi Yojimbo: The Crow #3 Review


Writer, Artist & Letterer: Stan Sakai

Colorist: Hi-Fi Colour Design

Cover Artists: Stan Sakai & Emi Fujii; Derek Chew; Mitsuhiro Arita

Publisher: Dark Horse Comics

Price: $4.99

Release Date: June 12, 2024


Inuyoshi captured Yukichi. The vicious leader doesn’t want competition from Gen, Stray Dog, and Usagi as his bounty hunters track the bandit Jimmu. Inuyoshi will kill Yukichi unless Usagi and his friends leave the area. But will Inuyoshi release Yukichi if Usagi, Gen, and Stray Dog agree to his terms? Let's grab our katanas, charge into Usagi Yojimbo: The Crow #3 and find out!


Story

As Merchant Yamada’s convoy traverses a narrow mountain pass, Jiro assuages Masa's concerns by reminding him that mercenaries protect them on their journey. Like his fellow porter, Masa is tired and wishes Merchant Yamada paid them as much as he did the mercenaries. When the two porters spot a crow flying overhead, Jiro muses that the bandit Jimmu reportedly has a crow, just like his legendary namesake. Masa dismisses Jiro’s worries that the crow could be a scout for Jimmu. Crows are stupid. They have no sense of loyalty!


Despite the friends’ attempts to distract and comfort each other on the long journey, Jimmu has laid a trap for them. As Jimmu’s people attack and people die around them, Jiro and Masa help each other. As their end nears, the friends confess how they wronged each other. Then Jiro opts for a reckless escape, and Masa follows his lead.


In Usagi Yojimbo: The Crow #3, Stan Sakai contrasts the need to survive versus the value of loyalty. Inuyoshi was once a samurai but became a ronin. The way his lord dismissed him embittered him. He admires strength and results, and those he hires emulate him. Two of his scouts worry about the cost of hiring additional bounty hunters to take on Jimmu’s organization. They comfort themselves that some new hires will die, leaving more of the bounty for them.


Jimmu also demonstrates how ruthlessness achieves results. Anyone who watches the news knows how vicious political battles can be. How many lords in Usagi's day began as bandits and built an organization so strong that others had to recognize their legitimacy? The legendary Jimmu was the first emperor who united the warring factions of Japan. The bandit in Sakai's story exhibits the organization and prowess necessary to become a rising power.


Much of Usagi Yojimbo: The Crow #3 concerns Masa and Jiro, Jimmu and his crow, and Inuyoshi and his bandits. Usagi and Yukichi bear some blame for their predicament, as they rescued Jimmu from Inuyoshi’s bounty hunters earlier. Usagi’s history with Inuyoshi tells him the vicious ronin cannot be trusted. Yet what can he do? Even if Usagi knew where  Yukichi was, how could he rescue his cousin from the bounty hunters? Could Usagi prevent Inyoshi or his people from killing Yukichi in such an attempt? Or, for that matter, prevent them from freezing his cousin in carbonite?


Art

Stan Sakai shows the sheer cliff along which the merchant party travels. Evergreens dot the mountainside, their exposed roots clinging to the rocky slope. The convoy traverses the narrow path single-file, or two people walk together like Jiro and Masa. There are a few packhorses, and some porters pull a wagon. The porters carry heavy packs while the mercenaries walk unladen by extra weight. Unlike the mountain pass of Coradhras, snow covers the mountainside, but a storm doesn’t make the path impassable.


Jimmu displays none of the lightheartedness he showed Usagi and Yukichi. As his spy alights on his shoulder, Jimmu issues orders. Trees fall. Arrows fly. Warriors leap to attack, swords drawn. Jimmu’s bandits don’t resemble Uruk-hai, but they inspire the same fear. While others run and chaos explodes around them, Jiro and Masa look out for each other. When the end comes, Jiro and Masa grasp each other’s hand in Usagi Yojimbo: The Crow #3.


Amid the white and gray mountains, Hi-Fi Colour Design helps characters pop by painting their clothing in bright colors. Yukichi brightens the gray and brown temple where Inuyoshi holds him captive. The surrounding greenery reminds us how the temple once contributed to the community. Intriguingly, the bounty hunter who brings Yukichi’s broken swords and relates Inuyoshi’s demand wears blue like Stray Dog and Usagi.


Stan Sakai rewards readers with generously sized letters in white dialogue balloons. Raised voices swell and darken words as trees crack and crash along the mountain pass. A boy's thoughts appear in a cloudy balloon, while colored question marks and exclamation marks join a skull in dialogue balloons. Thanks to Dark Horse for providing a copy for review.


Final Thoughts

Fate offers Usagi a hand as an act of selfishness returns to bite Inuyoshi’s bounty hunters amid a powerful meditation on friendship and loyalty in Usagi Yojimbo: The Crow #3.


Rating 9.8/10


To preview interior art see my review at Comic Book Dispatch.

Thursday, June 20, 2024

Aint No Grave #2 Review


Writer: Skottie Young

Artist: Jorge Corona

Colorist: Jean-Francois Beaulieu

Letterer: Nate Piekos

Cover Artist: Jorge Corona

Publisher: Image

Price: $3.99

Release Date: June 12, 2024


Ryder's horse refused to pass between the trees on the outskirts of Cypress. So, Ryder left her horse behind and trudged through the desert. She found a wooden shack and a water tower. Ryder gave the guard a coin minted in Cypress. The guard stamped its staff on the ground. A narrow pass opened between the adjacent sandstone hoodoos. Can Ryder reclaim her life now that she has gained entry to Cypress? Let’s saddle up, ride into Aint No Grave #2, and find out!


Story

Doc Francis gave Ryder a year to live if she took his treatment. But that’s not good enough for Ryder. So she searched her outlaw loot for a coin from Cypress. Then Ryder left Darius and Joe behind to bargain for her life. And Ryder only knows one sure means of persuasion.


While the guard follows her into Cypress, its inhabitants sense something different about her. They gather around. The lawman greets her with his rifle. "It's not your time," he tells her. Well, Ryder knows how to persuade him.


Things happen quickly in Aint No Grave #2. Burning wanted posters flutter through the air. They bear Ryder's portrait and the promise of 2 Markers Reward. But that's for her death. Ryder's worth nothing to them alive. So, all the townspeople produce guns, and Ryder doesn't have enough bullets to persuade them like she convinced the lawman. She flees, using a knife until she can reload her revolvers.


There’s an enchanting dream logic to Skottie Young’s story. One thing that grows clear is that Ryder has trust issues. Like many of us, she refuses to accept anything she doesn't want. But then, Ryder's life was filled with uncertainties. In the Old West, a gunslinger could be an outlaw one minute and a Sheriff the next. A short stay in jail could suddenly become a lynching. Doc Francis’ traveling medicine show didn’t inspire confidence. The only thing Ryder could count on was her family's love. She's determined to accomplish the impossible to gain a lifetime with Darius and Joey.


Art

Ryder passed a defile filled with skulls and bones on her journey between the hoodoos. But in Aint No Grave #2, the citizens of Cypress don’t resemble Aragorn’s glowing Army Of The Dead. The lawman comes closest, with his dry, whitened skin stretched over a gaunt (or skeletal) frame. Others display wrinkles and sagging flesh. Yet, whether their skin is desiccated or filled with boils, tumors, or sores, or their bodies have swollen with excess weight, the townspeople attack with manic energy. Their actions make it clear they want those markers. The lawman said Ryder wasn't ready to board a train. Was he referring to the ones that rumble through Cypress or those that chug across the river outside town? His statement awakens a memory of a shootout with a lawman during her career as an outlaw.


Jean-Francois Beaulieu lavishes a loaded palette of rich colors on Jorge Corona’s art in Aint No Grave #2. Like the Rocinha favela in the 2008 film The Incredible Hulk, Ryder runs and fights through a town that fills the chasm and climbs toward the black sun. Vivid coloring paints the vertically evolving town's neverending nightlife. Background colors change amid a stream of slow-motion silhouettes that reveal every moment of Ryder's frantic journey. Like Cypress, those who carry responsibility do so literally. The guard was so laden with belongings that it resembled a brown hill of dried grasses. The gaunt sheriff, dressed in white to compliment his desiccated frame, carried weapons, ammunition, and badges of authority. Ryder meets another person who bears the weight of his responsibilities on his shoulders. Adorned in brown and lavender, he inhabits purple shade. But what he gives her, like the sky overhead and the river outside town, has glowing blood-red eyes.


Like Stan Sakai in Usagi Yojimbo, Nate Piekos shoots generously sized black letters into polygonal balloons. Emotion and raised voices swell words and change color. Gunfire blasts through panels more vibrantly than Beaulieu’s yellow lines of speeding bullets, and a colorful sign pays homage to a Western filmmaker. Purple laughter greets Ryder's assertion that she will triumph where all others have failed in Aint No Grave #2. Thanks to Image for providing a copy for review.


Final Thoughts

While Ryder bought her way into Cypress, she won't find her enemy there. But her actions give others a means of repaying their debts in the mythological Spaghetti Western tale Aint No Grave #2.


Rating 9.4/10


For another cover see my review at Comic Book Dispatch.

Wednesday, June 19, 2024

Transformers #9 Review


Writer: Daniel Warren Johnson

Artist: Jorge Corona

Colorist: Mike Spicer

Letterer: Rus Wooton

Cover Artists: Daniel Warren Johnson & Mike Spicer; Jorge Corona & Mike Spicer; Karen S. Darboe; Jonathan Wayshak & David Baron; David Baldeón & Rex Lokus; Jason Howard & Annalisa Leoni; Jason Howard; John Giang; Alan Quah; Santa Fung; Marcelo Matere

Publisher: Image

Price: $3.99

Release Date: June 12, 2024


Soundwave raised the Decepticon spaceship Nemesis to phone a friend and sent Astrotrain off on an errand. Carly tried to kill Skywarp but became an apprentice to an iron giant. Spike missed his dad, and Optimus Prime dreamed of the young man’s childhood. Wheeljack turned the remains of Jetfire into a flying RV, and Optimus Prime said, “Let’s ride.” Where will the Autobots’ travels take them? And how much will Soundwave have to pay for his extradimensional phone call? Let’s recharge our Energon batteries, leap into Transformers #9, and follow Spike and Carly's transformative journey!


Story

Optimus Prime is on the trail of massive Energon readings. Cliffjumper detects them while piloting Jetfire over the ocean and spies a swirling whirlpool. A beam of energy shoots upward before Cliffjumper can avoid it. Jetfire crashes on the ocean floor, spilling his Autobot passengers. First on his feet, Optimus Prime beholds the device the Constructicons built to emulate Moses and create a divine pillar of fire. As a firefight erupts, Shockwave appears. At his feet lies a wounded Cliffjumper.


In Transformers #9, Soundwave has accomplished the first part of his grand strategy. After he and Thundercracker destroyed the USS Henry Harrisson, the Constructicons repurposed the aircraft carrier faster than the US Navy dismantled the USS Enterprise and built a stable dimensional portal to anchor a space bridge. The Constructicons also raised the Decepticon spaceship Nemesis and repaired it so Soundwave could contact Cybertron. Shockwave, the leader of the Decepticons on their homeworld, stands beside Soundwave on Earth. But Decepticons value strength. How long will the leaders work together until one decides he should be lord of all?


Daniel Warren Johnson fuels his story with stunning reversals. A character intent on revenge plays peacemaker. Another consigned to a hopeless fate receives a reprieve. Seemingly indomitable characters fall. And one Cybertronian forces Optimus Prime to do something he will regret forever. Transformers #9 ratchets up the stakes in the raging war between the Autobots and the Decepticons, endangering Earth and its fragile inhabitants more than ever. 


Art

Jorge Corona creates grand vistas as Shockwave beholds Soundwave's magnified face on the Nemesis viewscreen, and Astrotrain follows Starscream’s lead and plays King Kong. Optimus Prime gazes up at the Constructicons surrounding a circle of power and the surging seawater encircling the machinery projecting the space bridge. Sports cars race along a tree-lined road, only to become immense robots when squishy Humans threaten. Amid a multilevel firefight, a Decepticon gazes down upon an Autobot sprawled amid machinery, snaking tubes, and plants on the ocean floor. The metal face changes from fear to shock, relief, and mourning within four panels.


Mike Spicer lavishes a loaded palette on Corona’s art in Transformers #9. Pink and purple dominate the battle on the ocean floor, symbolic of the two key Cybertronians who use the space bridge to arrive on Earth. The green sea plants and Constructicons tie in with the towering trees and one of the cars racing through the forest. Spike beholds the white-coated doctor as he sits in his wheelchair. The dirty yellow-green hospital interior underscores the doctor’s prognosis.


Rus Wooten portrays Human speech with large-size black letters in white dialogue balloons. Transformers use italicized black letters in rectangular balloons with lightning bolt arrows, while Soundwave commands yellow words into blue balloons. Wooten helps us hear the immense energy of the space bridge, Cybertronians arrive in the dimensional portal, the gunfire of two battles, and a giant robot transform into a shape that must evoke bad memories for Spike in Transformers #9. Thanks to Image Comics, Skybound Entertainment, and Hasbro for providing a copy for review.


Final Thoughts

The Autobots receive reinforcements. Another leader joins the Decepticons. Soundwave gets a talking gun. And a Cybertronian makes the ultimate sacrifice in Transformers #9.


Rating 9.4/10


To view more cover art see my review at Comic Book Dispatch.